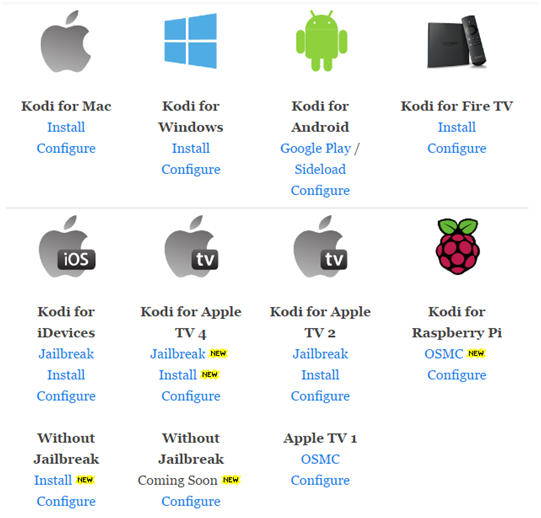
What you should know before installing Kodi
If you’ve landed on this page, we will assume that you already know what Kodi is, and what you are looking for. This article will guide you step-by-step through Kodi setup on MAC or PC machine, depending on what you have at home.
And even though, we would love just to skip the formalities and proceed with our short how-to; in order to make all the steps clear to you, as well as why they are necessary, we will have to deal with a few formalities first.
- Kodi is an open-source media player, similar to Windows Media Player – it plays music; allows you to watch TV shows, films or to stream live television and much more. So, it’s just a tool and we first need to install the right – specific to the machine – “tool” that handles all the content.
- Next, in order to gain access to the content, you need to establish a link to a server where all the add-ons and content is stored. For this we need Fusion Installer and depending on your machine, its resources and the operating system – this process will take you no more than 15 minutes.
- Now that you have access to the server with all the content – we can look for some add-ons libraries. There are huge libraries of free Kodi add-ons available.
So, from the Add-ons Server you need to call upon a specific add-on to enjoy the desired content. Do this in 2 ways:
- Easy (recommended) way – automatically configure Kodi add-ons setup using Config Wizard. This will enable the best available add-ons for Kodi, and will also customize some of the settings for you.
- “Old-school” (manual) way – use Add-on Installer. It is easy to install and use it, but it does require somewhat advanced familiarity with what you are doing and why.
IMPORTANT NOTES: The 2nd and 3rd points are the same regardless of the machine you are using and we will briefly cover both points towards the end of the guide. Also, the best VPN to use for Kodi is https://ipvanish.com, this will give you the best speed for streaming, the best selection of different countries to unblock content for and it will protect your ass in case you “accidentally” stream some pirated content.
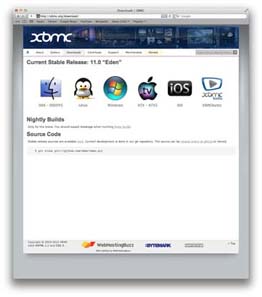
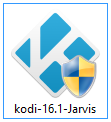
Last note before we proceed to install Kodi on your MAC computer is this – when downloading Kodi, be sure to download the latest stable version; this is always best to do from the official Kodi website. At the moment of writing this Kodi setup guide for MAC and PC – the latest stable version is –Kodi v16.1 “Jarvis”, while the next generation, Kodi v17.0 “Krypton,” is still a work-in-progress.
I’ve ran into a comment about how easy it is to install Kodi on your MAC machine – apparently, it’s easier to install Kodi on your MAC, than it is to install Microsoft Office. A rather symptomatic remark, if you ask me, but I have to admit – a truthful one, for the whole process is less than 5 minutes long!
Let’s start:
- Download the current and the right version of Kodi software package (first check whether you are running OS X or x86). After you have downloaded the right version, you should extract the Disc Image, so simply double-click on your new file.
- This will extract the disc image onto your desktop. Open the extracted disk image and then drag and drop the Kodi logo to the Applications folder.

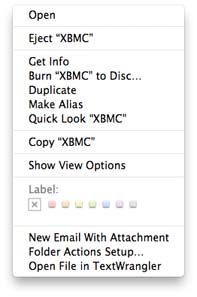
- Now, get back to the previous step and right-click on the disk image on your desktop and select Eject “XBMC”
- From Applications menu, run Kodi application. It may happen that your computer doesn’t want to launch your Kodi app because it was built by unknown developers. This is the routine step for all MAC users: simply click on the little Apple icon and go to System Preferences, then Security & Privacy. Unlock the lock in the lower left corner of the popup window and in the section Allow apps downloaded from: check Anywhere.

At this point, you need the access to all the add-ons; so from here proceed with installing Fusion Installer and a) Config Wizard for automatic installation and configuration or b) Add-on Installer for manual procedure.
Kodi Setup Guide for PC (Windows)
Installing Kodi on PC machine is even simpler – there are only 2 to 3 steps and it lasts less than 10 minutes!
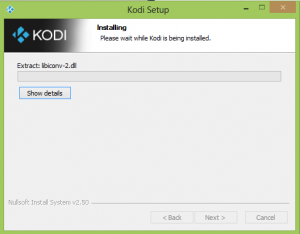
- Once again, download the current stable version of Kodi for Windows.
- Launch the installation, click Next, wait a couple of minutes for it to finish and click Finish.
As we mentioned in the first section of the guide – after you’ve installed Kodi, you have to have a link to add-ons server and after that you have to call upon the desired add-on(s). So, the first step is to configure Fusion Installer:
- From File manager tab, go to Add source.
- In the input box marked <None> type the following address: http://fusion.tvaddons.ag and confirm by clicking Done.
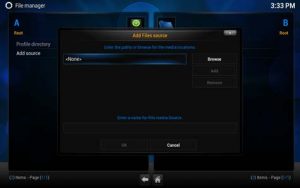
- In the bottom input field type in fusion, again confirm by clicking Done and OK.
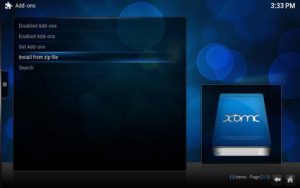
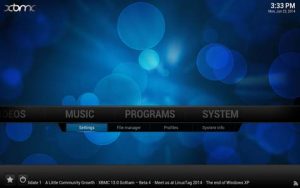
- Go to the main menu, Settings tab and then choose Add-ons tab.
- This will start a dialogue box “First run help…” – simply click OK to dismiss it and proceed to the next step.

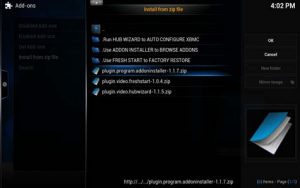
- Select “Install from zip file” and then fusion from the list. This allows you to open any folder you wish to install Kodi add-ons from.
- You see that start-here folder? Well, start by opening that folder and clicking on the file video.hubwizard-1.1.5.zip.
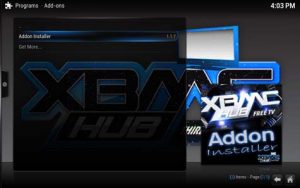
- Now go to the main menu and select PROGRAMS From here you’ll be able to launch Config Wizard which will enable you all available add-ons.
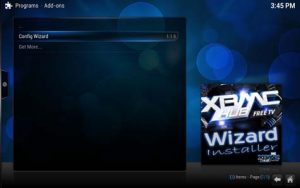
1. Config Wizard
This set of steps will allow you to browse all sorts of Kodi add-ons whether you’re using a PC or a MAC. It only requires several additional steps and you’re there!
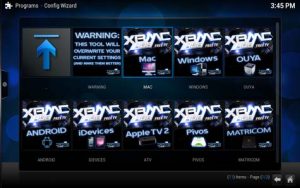
- You have launched Config Wizard in the previous step. Now you need to select your platform – so, PC users will select Windows and MAC users will select the card that says Mac on it.
- It will open a little popup window and click Yes. Wait several minutes for Config Wizard to do its work – configure your Kodi automatically and bring you all sorts of add-ons available.
- After this, the installation wizard will return you to the main menu and you should restart the application.
- At the next start, the app will want to update – it shouldn’t take more than 5 minutes depending on your machine.
This is it – you have now installed Kodi and you can start enjoying the variety of Kodi add-ons! The best thing – it only took about 20 minutes in total and was straightforward from the step
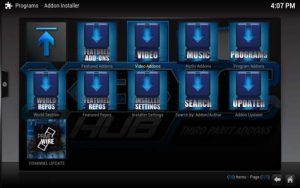
2. Add-on Installer
On the other hand, if you’re one of those people who love doing everything the old-school way or manually, you can gain access to Kodi add-ons by running Add-on Installer, instead of Config Wizard. The difference is that Config Wizard installs all the best add-ons automatically, and Add-on Installer allows you to choose from the bunch.
It’s nothing more complicated than any other phase you’ve already done:
- Obviously, you’ll need Fusion Installer installed before anything.
- From the main menu go to System tab and here select Settings.
- This action will bring forth a new window – click the tab Add-ons.
- Install from zip file – remember this step? From here click fusion from the list and start-here
- This time open the fileprogram.addoninstaller-1.1.7.zip.
- Now, from the main menu, go to PROGRAMS and from here launch Add-on Installer.
- When you launch it for the first time, it needs to configure itself, so give it a couple of minutes.
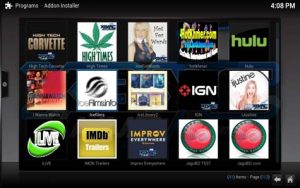
- Choose the add-on category you want – video, music, programs, featured add-ons…
- It will open the category and you can browse what’s in the offer! After you decide on the add-on you wish, simply click on it and choose Install.
- Again wait a couple of minutes for the add-on to complete the installation.
- Now, to start your add-on – go to the main menu, Videos and choose Add-ons.
- This will allow you to see what add-ons you have installed – click the one you wish.
- To allow the hidden settings, click on Installer Settings. This is optional.
Using Add-on Installer is a bit more advanced than Config Wizard and it implies that you go over this process each time you wish to add an add-on, while Config Wizard installs all the most popular add-ons during the installation process. But, even though it’s a bit complex, it’s not that complex that a 10-year-old can’t master it! So just relax, browse and enjoy!
WARNING: Some of the add ons in the tv add ons pack stream pirated content. You can get in deep trouble and get some massive fines for downloading and streaming illegal content. Law firms are currently getting the details of people streaming illegal content and prosecuting them. If you want to protect against such instances as your child accidentally streaming a pirated movie, then you need a VPN! A VPN is a software app that you run before you turn on Kodi and it encrypts all of your streaming so no one knows what you are doing online, not even you ISP or government. In our extensive testing we found IPVanish to be the best VPN for use with Kodi. https://ipvanish.com
We hope this short guide helps you with your Kodi no matter which device you are using; and we hope you will continue to discover new and each more interesting than the previous add-ons for Kodi.
Also, if you have any Kodi-related questions or comments, don’t hesitate to ask or share a line or two. In the meantime…
… Enjoy!