Matricom G-Box Q2 was designed specifically to be 100% compatible with Kodi Media Center! And indeed, it is THE only device that works like a Swiss watch with Kodi. It already has Kodi setup on it including all available features and codecs.
Now, the most recent G-Box Q2 comes with the second latest stable version of Kodi (Kodi v15.2), but you can update your Kodi to the current stable version which, at the moment of writing this short guide, is Kodi v16.1 “Jarvis.” All it takes is a simple fix and your G-Box is all setup and ready to stream!
Update to Kodi v16.1 “Jarvis”
Before you do anything, go to your Android Settings and make sure to allow app installations from “Unknown sources.”
- Open the Google browser and visit kodi.tv.
- Go to Downloads and choose the Android version of the setup (ARM file).
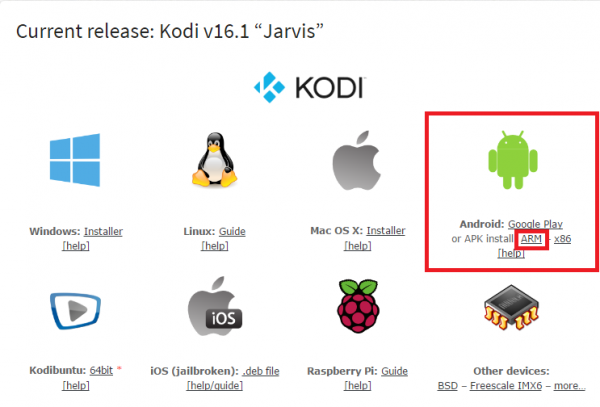
3. Once it’s downloaded, go to AppInstaller and run the setup from here.
4. The procedure is more or less the same as with any other Android app. Give it a few minutes for the installation to finish and simply follow the instructions.

5. Open the application for the first time – you will notice that the screen looks a bit different. But, everything is already in its place – it’s already configured and has the most common add-ons.

If you wish to add more sources, the procedure is pretty much the same as with any other platform or OS:
- Simply go to File manager and click on Add source.
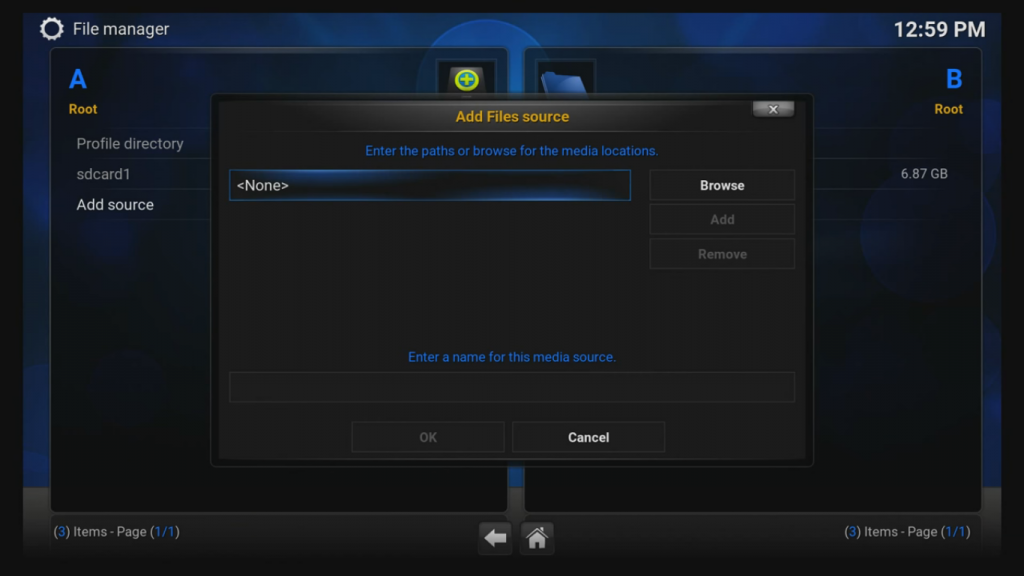
2. This will open a popup window where you will need to enter the new source. Click the field marked with <None> to enter the URL http://fusion.tvaddons.ag and click Done to confirm the entry.
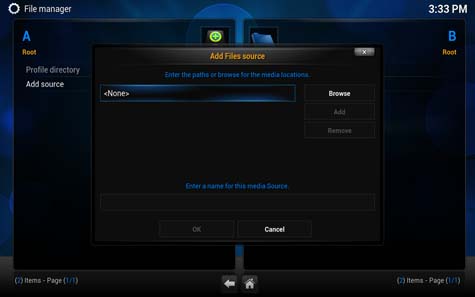
3. Afterward, you just need to name source you have just entered, so in the below input box type infusion. Click Done to confirm.

4. If you go to your File manager again, you will notice that Fusion has been included.
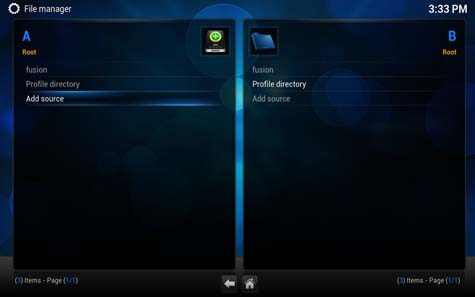
Now you have access to even more add-ons, but you need to choose which ones you want.
- Go to Settings and then Add-ons on the left side of the panel.
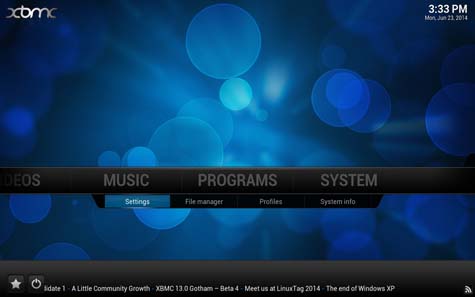
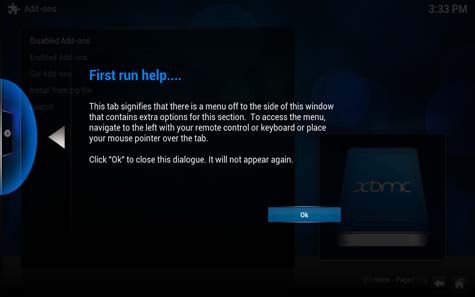
2. This will open a new window “First run help…” To continue click OK.
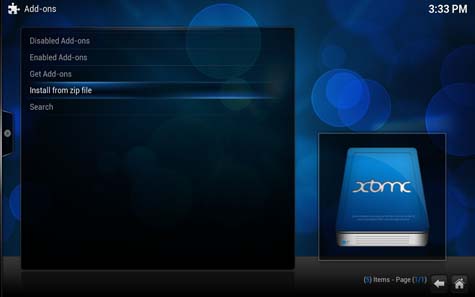
3. In the Add-ons window select Install from zip file and then choose fusion
4. Click start-here folder and this will enable you to choose Config Wizard or Add-on Installer which will configure your Kodi.
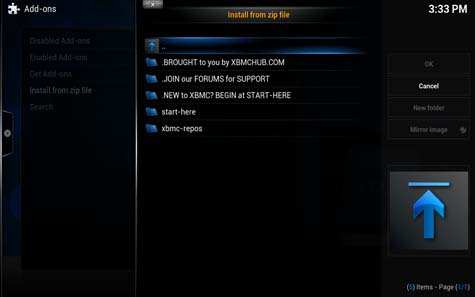
5. To install the add-ons you wish, instead of start-here folder, click on xbmc-repos It contains all the finest Kodi repositories.

Installing Config Wizard
- Navigate to the Settings tab once again and select the Add-ons

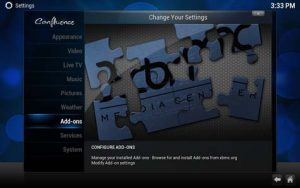
2. Click on Install from zip file again and select fusion from the list. We have done this when we configured Fusion Installer.
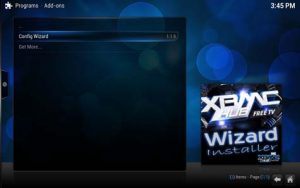
3. Now, select video.hubwizard-1.1.5.zip file, return to the main menu and click PROGRAMS menu.

4. Run Config Wizard and select your platform. In this case, click the Matricom card.
5. Click Yes to continue. Depending on your device, it may take a few minutes.
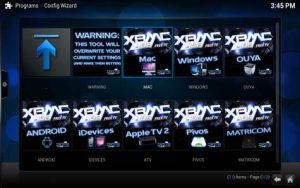
6. When the installation completes, you will be automatically returned to the main menu. Click the power button in the left corner of the screen and if required click Exit.
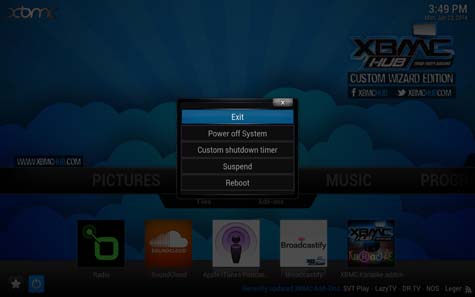
7. Re-launch Kodi app and allow it some 5 or so minutes for any updates to be installed.
That’s it! Hopefully, if you have followed these really simple instructions, you can sit back and enjoy your Kodi. Should you wish to add something to this short guide or have any questions, feel free to contribute in our comment section.
Enjoy!
WARNING: Some of the add ons in the tv add ons pack stream pirated content. You can get in deep trouble and get some massive fines for downloading and streaming illegal content. Law firms are currently getting the details of people streaming illegal content and prosecuting them. If you want to protect against such instances as your child accidentally streaming a pirated movie, then you need a VPN! A VPN is a software app that you run before you turn on Kodi and it encrypts all of your streaming so no one knows what you are doing online, not even you ISP or government. In our extensive testing of the best VPN providers we found IPVanish to the best performing VPN when used with Kodi. Find out more here https://ipvanish.com
